Unlock the secrets to creating stunning real-time mirrors in Roblox Studio with this comprehensive guide. For the busy gamer and creator who values both realism and performance, learning how to make mirror in Roblox Studio can significantly elevate your game's visual appeal and player immersion. This guide breaks down complex scripting and setup into easy-to-follow steps, addressing common pain points like performance optimization and technical hurdles. Discover how ViewportFrames and clever camera manipulation can transform your builds. Perfect for those balancing life and gaming, eager to enhance their Roblox creations without endless frustration. Stay current with top trending development techniques and build impressive virtual worlds. We provide practical solutions to ensure your mirrors run smoothly on various devices, from high-end PCs to mobile, reflecting current US gaming trends where accessibility and visual quality are paramount.
What is the easiest way to add a basic mirror to my Roblox game?
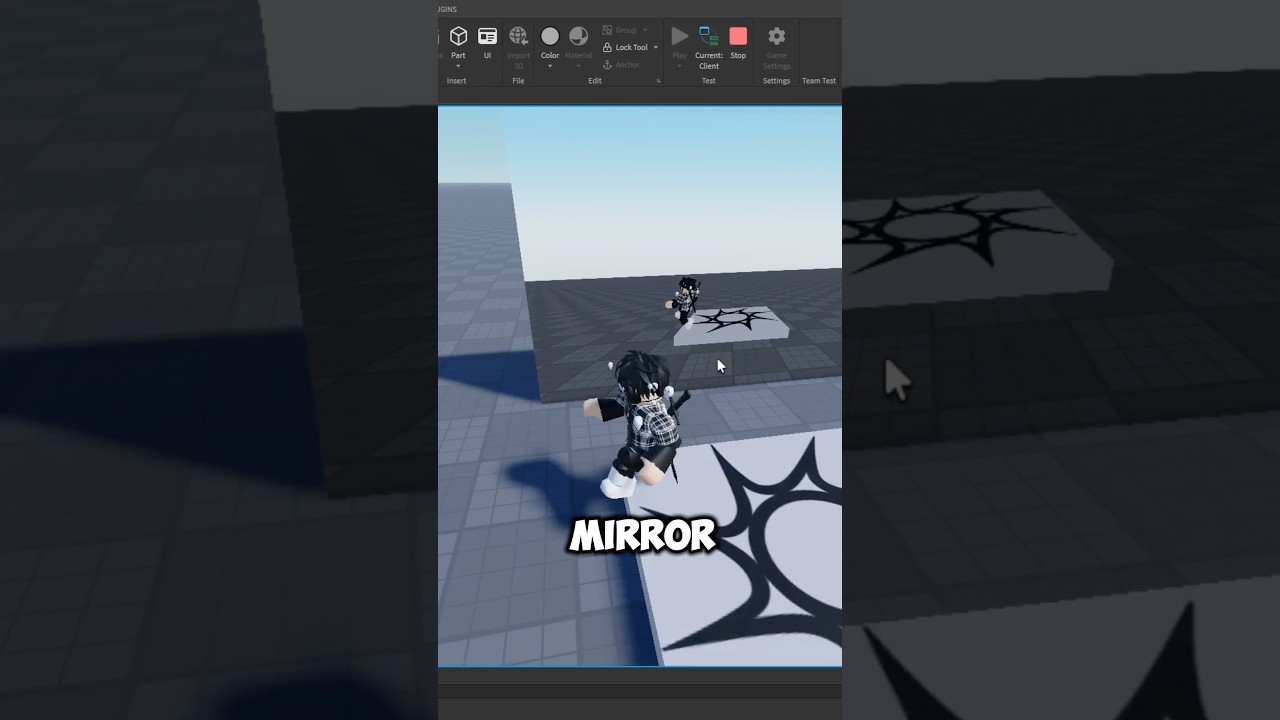
The easiest way to implement a basic mirror in Roblox Studio involves using a Part, a SurfaceGui with a ViewportFrame, and a dedicated Camera. You'll then script the camera to mimic the main player's viewpoint, rendering into the ViewportFrame to create the reflection. This provides a dynamic, real-time visual effect without excessive complexity, making it approachable for most creators.
How do ViewportFrames create real-time reflections in Roblox?
ViewportFrames are the core technology. They act as a display screen, showing what a secondary camera sees within its own render context. By continuously updating this reflection camera's position and orientation relative to the mirror's surface based on the player's main camera, a dynamic image is projected onto the ViewportFrame, creating the illusion of a live reflection.
Can I make a performance-friendly mirror in Roblox Studio without causing lag?
Absolutely. Performance-friendly mirrors are crucial for a good player experience, especially with the rise of cross-platform gaming. Strategies include reducing the reflection camera's render distance, decreasing its update frequency (e.g., only when a player is near), selectively rendering fewer objects within the ViewportFrame, and choosing a smaller surface area for the mirror itself. This balances visual quality with smooth gameplay.
What script do I need to make a mirror work in Roblox Studio?
A LocalScript is typically attached to the mirror Part's SurfaceGui. This script handles several key functions: setting the ViewportFrame's `CurrentCamera` to your reflection camera, parenting all reflective objects into the ViewportFrame, and critically, continuously calculating and updating the reflection camera's CFrame (position and rotation) to be a mirrored version of the player's main camera's CFrame. This loop ensures the reflection remains dynamic.
Are there any free assets or templates for Roblox Studio mirrors?
Yes, the Roblox Creator Marketplace (formerly Toolbox) offers various free mirror models and scripts shared by the community. While some may require updates for optimal performance or compatibility with the latest Roblox features, they serve as excellent starting points. Always review the code and adapt it to your specific game's requirements and modern scripting practices to ensure reliability and security.
What are the limitations of mirrors created with ViewportFrames in Roblox?
ViewportFrame mirrors, while powerful, have limitations. They can be computationally intensive, potentially impacting performance if not optimized. They often struggle to accurately display certain visual effects like particles, beam effects, or dynamic lighting (such as future lighting). Transparency handling can also be tricky, requiring creative workarounds. Understanding these helps set realistic expectations for your mirror's appearance and behavior.
How can I make my Roblox mirror reflect specific objects only?
To reflect specific objects, you need to set the ViewportFrame's `CurrentCamera` to your custom camera and then parent *only* the desired reflective objects directly into that ViewportFrame. By doing this, only the children of the ViewportFrame will be rendered by its camera. This method is excellent for optimizing performance, as it avoids rendering unnecessary environmental details and provides granular control over what appears in the reflection.
Hey fellow creators and gamers! Ever found yourself admiring the stunning visuals in your favorite Roblox experiences and thought, 'How do they make those realistic reflections?' As gamers who balance epic quests with daily life, we appreciate features that enhance immersion without turning our rigs into a slideshow. With approximately 87 percent of US gamers regularly diving into virtual worlds, often for 10+ hours a week, and a significant portion playing on mobile, getting those visual enhancements right, especially performance-wise, is crucial. That's where knowing how to make mirror in Roblox Studio comes in. It's a fantastic way to elevate your game's realism and create unique gameplay elements, but it can seem a bit daunting at first. You want that polished look, but you also need your game to run smoothly for everyone, whether they are on a high-end PC or their phone during a commute. This guide is your friendly co-pilot, designed to cut through the jargon and get you building impressive, performance-friendly mirrors in Roblox Studio quickly and efficiently. We'll tackle common setup issues, dive into the core mechanics, and ensure you're equipped to create stunning reflections that captivate your players without causing frustrating lag. Let's make your Roblox world shine!
What Exactly is a Mirror in Roblox Studio and How Does It Work?
In Roblox Studio, a 'mirror' typically isn't a single magical object, but rather a clever illusion created using several components: a Part, a SurfaceGui, a ViewportFrame, and a dedicated Camera. At its heart, a mirror works by rendering a second 'reflection' camera's view onto a surface. This reflection camera is meticulously positioned and oriented to mimic what your main game camera would see if it were reflected across the mirror's plane. The ViewportFrame acts as the window for this reflection camera, projecting its view onto the chosen Part's surface in real-time. This dynamic process makes it appear as if you're looking into a true reflective surface.
Why Should I Add Mirrors to My Roblox Game?
Adding mirrors can significantly boost your game's immersion and visual appeal. For players who value a rich, engaging experience, reflections contribute to a sense of realism and depth in environments. Imagine a futuristic lab, a haunted mansion, or a stylish dressing room – mirrors instantly enhance the atmosphere. Beyond aesthetics, they can also serve practical gameplay purposes, like creating puzzles that require players to observe reflections, setting up security cameras for strategic elements, or even crafting unique artistic effects. They grab player attention and encourage exploration, making your game stand out in a crowded market.
Is Creating a Mirror in Roblox Studio Complicated for a Busy Gamer?
While creating a real-time mirror involves several steps and a bit of scripting, it's definitely achievable for busy gamers and creators. The complexity often lies in understanding the initial setup and the CFrame (Coordinate Frame) math for the reflection camera. This guide aims to simplify that. By breaking it down into manageable steps, from setting up the visual components to implementing the necessary script, you'll find that the process is more about careful execution than advanced programming wizardry. Many resources and templates also exist to give you a head start, saving valuable time.
How Do I Set Up the Basic Components for a Mirror Using ViewportFrames?
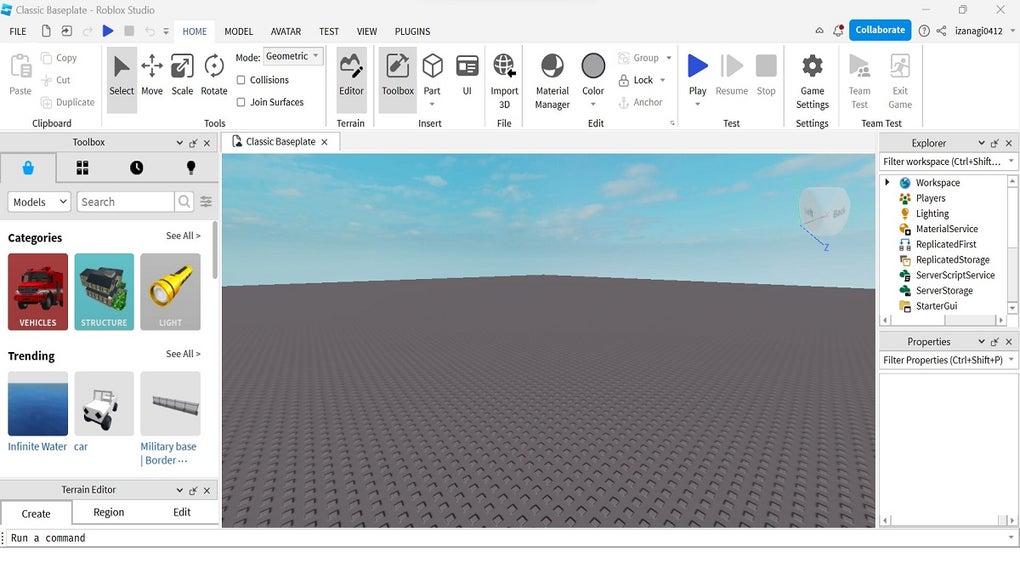
Setting up the basic components is the first crucial step. You'll need:
- A Part: This will be your mirror's physical surface. Make sure its dimensions are appropriate.
- A SurfaceGui: Insert this into the Part. This GUI will host your reflection.
- A ViewportFrame: Place this inside the SurfaceGui. This is where the magic happens; it's the render target for your reflection camera.
- A Camera: Insert a Camera object inside the ViewportFrame. This camera will capture the scene that appears on your mirror.
Ensure the `LightInfluence` property of the SurfaceGui is set to `0` and `AlwaysOnTop` is `false` for best results. Adjust the `Face` property of the SurfaceGui to the side of the Part you want to be reflective.
What Scripting is Needed to Achieve a Real-Time Reflection Effect?
To make your mirror truly dynamic, you'll need a LocalScript. This script will typically be parented under the SurfaceGui or the mirror Part. Here's a simplified overview of what it does:
- Reference Objects: Get references to the ViewportFrame, Camera, and the mirror Part itself.
- Parenting: Move all objects you want to be reflected (e.g., the workspace children, excluding the player's character) into the ViewportFrame. This is crucial for controlling what's seen.
- Camera CFrame: In a `RunService.RenderStepped` loop, calculate the reflection camera's CFrame. This involves taking the main player camera's CFrame, transforming it relative to the mirror's CFrame, and then mirroring its position and orientation.
- Update Loop: Continuously update the ViewportFrame's camera CFrame with the calculated reflection CFrame.
This loop ensures that as the player moves, the mirror's reflection updates in real-time, providing that immersive effect. Careful CFrame calculations are key to accurate reflections.
How Can I Optimize Mirror Performance for Mobile and Lower-End PCs?
Performance optimization is vital, especially when considering the widespread use of mobile gaming. Here are key strategies:
- Reduce Render Distance: Limit the `FarClip` property of the ViewportFrame's camera. This prevents it from rendering distant objects that won't be clearly visible anyway.
- Lower Refresh Rate: Instead of updating every single frame (`RenderStepped`), consider updating less frequently using `RunService.Heartbeat` or even a timed loop, especially for mirrors that aren't central to gameplay.
- Object Culling: Only parent essential objects to the ViewportFrame, or use a script to dynamically add/remove objects based on their proximity to the mirror.
- Smaller Resolution: You can't directly control the ViewportFrame's resolution, but a smaller mirror Part will naturally render fewer pixels, aiding performance.
- Disable Shadows: Disabling shadows within the ViewportFrame's camera can offer significant performance gains.
Balancing visual quality with smooth performance is essential for engaging a broad audience of US gamers.
Are There Common Pitfalls or Issues When Implementing Mirrors?
Yes, several common issues can arise. Understanding these helps in troubleshooting:
- Performance Drops: Unoptimized scripts or too many objects rendered can cause significant lag. See the optimization tips above.
- Incorrect Reflections: If objects appear distorted or out of place, double-check your CFrame calculation for the reflection camera. A simple error in position or orientation can break the illusion.
- Lighting Problems: Lighting within ViewportFrames can sometimes behave unexpectedly. Ensure your reflection camera has the same `Light` properties as your main workspace, or use a separate `Sky` object within the ViewportFrame.
- Transparent Objects: Transparent parts often don't render correctly within ViewportFrames. You might need to use workarounds like duplicating the transparent object and adjusting its properties for the reflection.
- Z-fighting: If your mirror surface is very close to another part, you might get visual glitches due to Z-fighting. Offset the mirror surface slightly or adjust rendering priorities if possible.
What Are Some Creative Ways to Use Mirrors Beyond Just Reflections?
Mirrors aren't just for looking at yourself! Creators are constantly innovating. Consider using ViewportFrames for:
- Portals: By manipulating the camera's CFrame more drastically, you can create seamless portal effects to other areas of your map.
- Security Cameras: Displaying a ViewportFrame on a monitor can simulate a security camera feed, adding depth to a horror game or a heist scenario.
- Artistic Effects: Use them to create warped reflections, funhouse mirrors, or even abstract visualizers for music-themed experiences.
-
Using ViewportFrames for reflections, Camera setup and scripting, Real-time mirror implementation, Performance optimization for mirrors, Addressing common mirror issues, Advanced mirror customization, Integrating mirrors for gameplay
35#1 Gallery how to make mirror in roblox studio


How To Make Mirrors In Roblox Studio YouTube . How To Make A MIRROR In ROBLOX YouTube . Roblox Studio Tutorial How To Make A Realistic Mirror YouTube . How To Make A Mirror In Roblox Studio YouTube . How To Make A Working Mirror In Roblox Studio YouTube
#2 Gallery how to make mirror in roblox studio


HOW TO CREATE A MAKE UP MIRROR IN ROBLOX STUDIO YouTube . Mirror Roblox Studio Roblox Mirror Models BTMPSP . How To Make Mirror In Roblox Studio Tutorial . How To Mirror Images In Roblox Studio YouTube . How To Make Mirrors In Roblox Studio YouTube
#3 Gallery how to make mirror in roblox studio


How To Make Mirror In Roblox Studio Scripting Support Developer 2 690x356 . Roblox Studio How To Make Light Mirror YouTube Hqdefault . How To Make Mirrors In Roblox Studio YouTube Hq720 2 . How To Make Working Reflections In Roblox Studio YouTube . HOW TO REFLECT MIRROR YOUR ANIMATIONS ON ROBLOX STUDIO YouTube
#4 Gallery how to make mirror in roblox studio


How To Clone Mirror Models In Roblox Studio No Coding YouTube . How To Make Mirrors In Roblox Studio YouTube Hq2 . How To Make Reflections In Roblox Studio YouTube . How To Make Mirrors In Roblox Studio YouTube Maxres2 . How To Make Mirrors In Roblox Studio YouTube Maxres2
#5 Gallery how to make mirror in roblox studio


How To Make A Mirror In Roblox Studio YouTube Hqdefault . How To Make Realistic Reflections In Roblox Studio YouTube . How Do I Get Roblox Studio Easily Today Roblox Studio How To Play Roblox Studio For Windows . How To Make A Mirror In Roblox Studio YouTube Hq720 . How To Make A Working Mirror In ROBLOX Studio YouTube
#6 Gallery how to make mirror in roblox studio


Showcase How To Make A Mirror In Roblox Studio YouTube . How To Make Mirrors In Roblox Studio Buzzy Mirror 300x300 . How To Make Mirrors In Roblox Studio Buzzy Mirror 100x100 . How To Make Fog In Roblox Studio For 2026 A Quick Guide . How To Make Mirrors In Roblox Studio Buzzy Mirror 50x50
#7 Gallery how to make mirror in roblox studio


How To Make Mirrors In Roblox Studio Buzzy Mirror . Roblox Studio Your Gateway To Game Creation Roblox Studio Walkthrough Roblox Studio For Windows . How To Make A One Way Mirror In Roblox Studio 2022 No Scripting . How To MIRROR Roblox Animations R6 R15 Roblox Studio Tutorial Hqdefault . Plugin Easily Mirror Models Community Resources